
Fondant is a sweet, pliable sugar dough that’s often used in cake decorating. Its smooth, sleek appearance and ability to be shaped into intricate designs make it a popular choice for professional cake decorators. Whether you’re decorating a wedding cake, a birthday cake, or just a special treat for yourself, fondant can help you create a polished, elegant look. In this step-by-step guide, we’ll show you how to decorate cakes with fondant, from preparing the cake to adding beautiful finishing touches.
What is Fondant?
Fondant is a smooth sugar paste made from sugar, water, gelatin, and glycerin. It has a smooth, pliable texture that allows it to be rolled out and draped over cakes or shaped into decorative elements. There are two main types of fondant: rolled fondant and poured fondant.
- Rolled Fondant: The most commonly used type for cake decoration. It’s rolled out like dough and then placed over cakes to create a smooth surface.
- Poured Fondant: A thicker, glossy fondant used for coating candies or glazing cakes. It’s poured over the cake rather than rolled.
In this guide, we’ll focus on working with rolled fondant, which is perfect for achieving a smooth, polished finish on cakes.
Ingredients for Fondant
To make your own fondant, you’ll need the following ingredients:
- 1 lb (450g) powdered sugar
- 1/4 cup water
- 1 tbsp unflavored gelatin
- 1/4 cup light corn syrup or glucose syrup
- 1 tbsp glycerin
- 1 tsp vanilla extract (optional, for flavor)
- 1/2 tsp vegetable shortening (for greasing)
You can also purchase ready-made fondant if you prefer convenience. However, homemade fondant often results in a smoother texture and can be flavored to your liking.
Tools You’ll Need
Before you begin, gather the following tools:
- Rolling pin
- Cake turntable
- Sharp knife or pizza cutter
- Fondant smoother
- Small offset spatula
- Cornstarch or powdered sugar (for dusting)
- Food coloring (if you plan to color your fondant)
Step-by-Step Instructions for Decorating Cakes with Fondant
Step 1: Prepare the Cake
The first step in fondant cake decoration is preparing the cake. Fondant requires a smooth, sturdy base to sit on, so it’s essential to level your cake and apply a crumb coat.
- Bake the Cake: Bake your cake layers and allow them to cool completely before decorating.
- Level the Cake: Use a serrated knife to level the top of each cake layer. This ensures the cake is even and flat.
- Crumb Coat: Apply a thin layer of buttercream frosting to the cake to seal in the crumbs. This will help the fondant adhere to the cake and provide a smooth surface for decoration.
- Chill the Cake: After applying the crumb coat, refrigerate the cake for at least 30 minutes to set the buttercream. This will help the fondant sit evenly on the cake.
Step 2: Roll Out the Fondant
Now that your cake is ready, it’s time to prepare the fondant.
- Dust Your Surface: Sprinkle a clean work surface with powdered sugar or cornstarch to prevent the fondant from sticking.
- Knead the Fondant: Take your fondant (whether homemade or store-bought) and knead it until it’s soft and pliable. If the fondant is too stiff, add a small amount of vegetable shortening to soften it.
- Roll the Fondant: Using a rolling pin, roll the fondant out into a thin, even sheet. Aim for a thickness of about 1/8 inch (3mm). Make sure the fondant is large enough to cover the entire cake, including the sides.
Step 3: Cover the Cake with Fondant
Once your fondant is rolled out, you’re ready to cover your cake.
- Lift the Fondant: Gently lift the rolled fondant using the rolling pin or by folding it in half. This will help prevent it from tearing when transferring it to the cake.
- Drape the Fondant: Place the fondant over the chilled cake. Carefully drape the fondant over the top and allow it to fall over the sides.
- Smooth the Fondant: Use your hands or a fondant smoother to gently smooth the fondant, starting at the top and working your way down the sides. Be sure to eliminate any air bubbles or wrinkles by smoothing out the edges and pulling the fondant tight around the cake.
Step 4: Trim the Excess Fondant
Once the fondant is smooth and tightly adhered to the cake, it’s time to trim the excess.
- Trim the Bottom: Use a sharp knife or pizza cutter to trim the excess fondant around the base of the cake. Leave about 1 inch of fondant to ensure full coverage, then cut off the excess.
- Smooth the Edges: Gently smooth the edges of the fondant where it meets the base of the cake using your fingers or a fondant smoother. This will give the cake a clean, professional finish.
Step 5: Add Decorative Elements
At this point, you can start adding decorative elements to your fondant-covered cake. There are countless ways to decorate with fondant, including:
- Fondant Flowers: Roll out fondant, cut out flower shapes, and assemble them to create beautiful fondant flowers.
- Fondant Ribbons: Roll the fondant into long strips and drape them around the cake for a classic, elegant look.
- Embossing: Use fondant embossing tools or texture mats to create patterns and designs on the fondant.
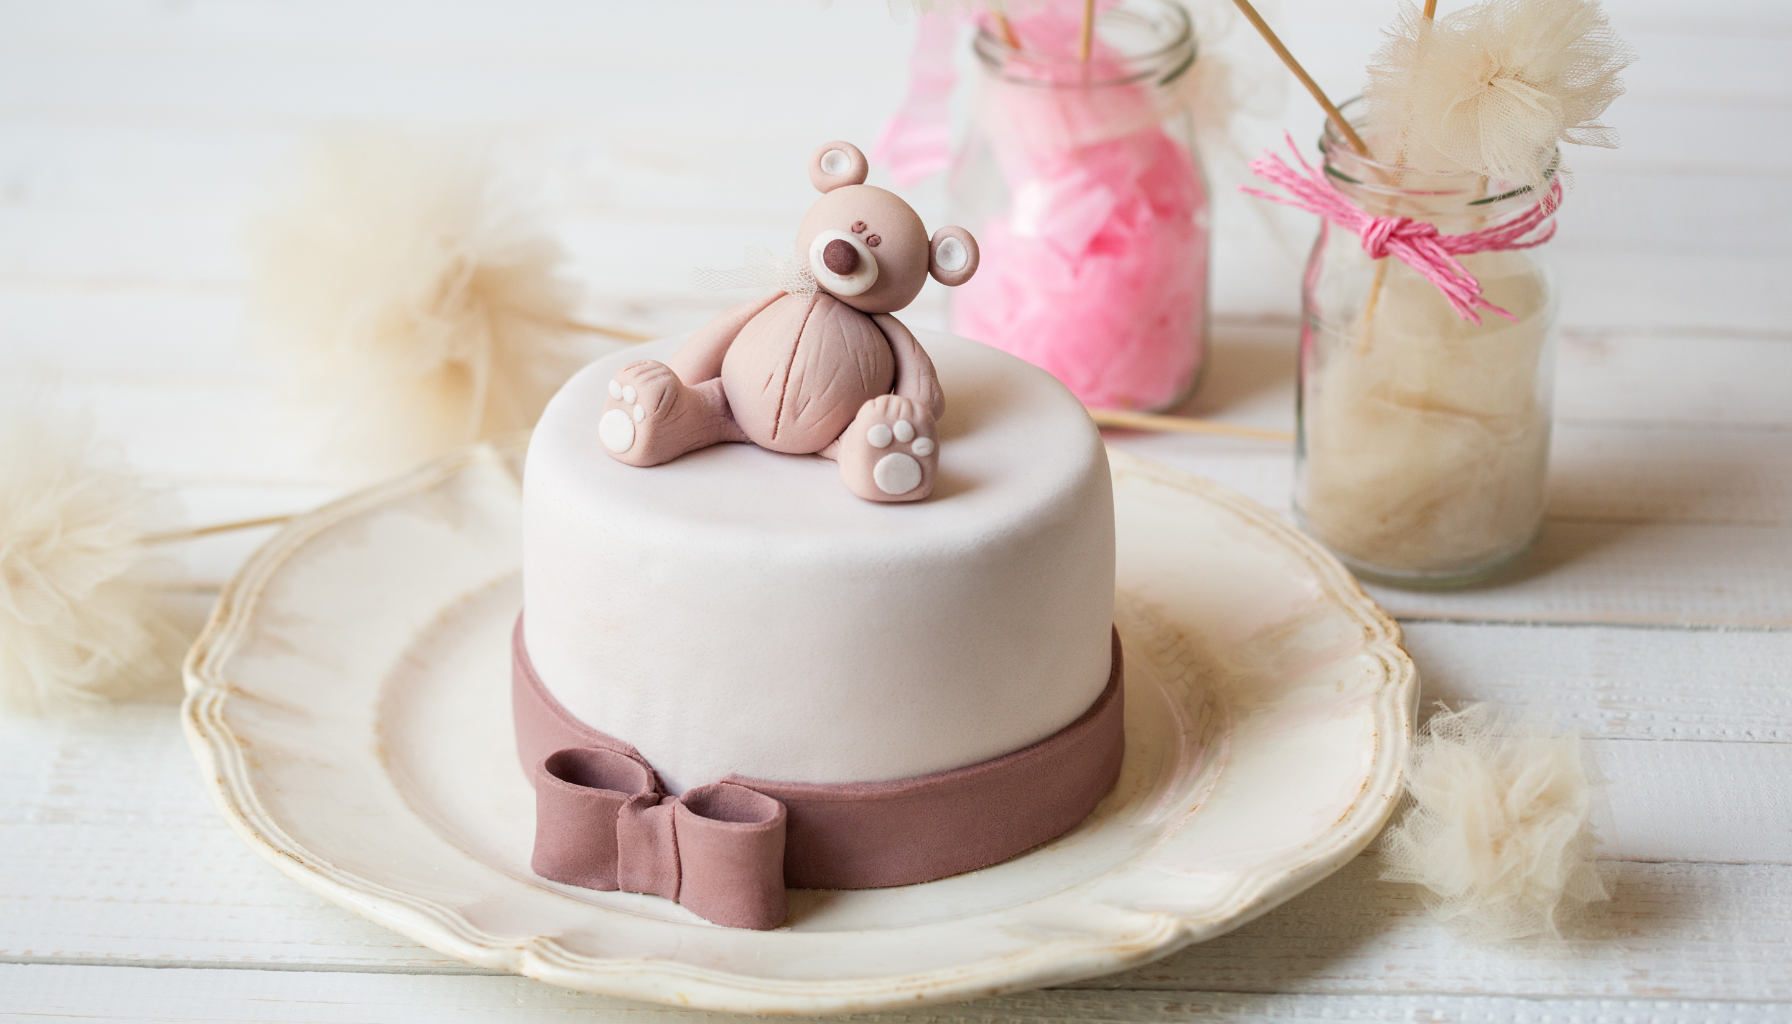
- Fondant Figures: Shape fondant into small figurines or other objects for a personalized touch, such as animals, flowers, or characters.
- Painting: Use edible food colors to paint onto the fondant, creating intricate designs and patterns.
Step 6: Finishing Touches
For a polished look, you can finish your fondant cake with some final touches:
- Fondant Smoother: Use a fondant smoother to ensure the surface is perfectly smooth and free of imperfections.
- Edible Glitter or Dust: Add a touch of sparkle to your fondant cake by dusting it with edible glitter or luster dust.
- Borders and Piping: Add piped buttercream borders, fondant accents, or other decorative elements to enhance the cake’s appearance.
Tips for Working with Fondant
- Use a Fondant Smoother: A fondant smoother is an essential tool for achieving a perfectly smooth finish. It helps eliminate air bubbles and creases.
- Work Quickly: Fondant can dry out quickly, so work fast to avoid it becoming too stiff or brittle.
- Keep Fondant Covered: If you’re not using the fondant immediately, wrap it tightly in plastic wrap and store it in an airtight container to prevent it from drying out.
- Practice Makes Perfect: Working with fondant takes practice, so don’t be discouraged if your first few attempts aren’t perfect. Keep practicing, and you’ll improve with each cake.