
Pumpkin pie is one of the most iconic desserts of the fall season, and for good reason. Its creamy, spiced filling and flaky crust create the perfect balance of sweetness and warmth. Whether you’re preparing for Thanksgiving, a cozy autumn dinner, or simply craving a comforting dessert, pumpkin pie is always a crowd-pleaser. In this article, we’ll guide you through the process of making a perfect pumpkin pie, from the filling to the crust, ensuring that it’s smooth, flavorful, and simply irresistible.
What is Pumpkin Pie?
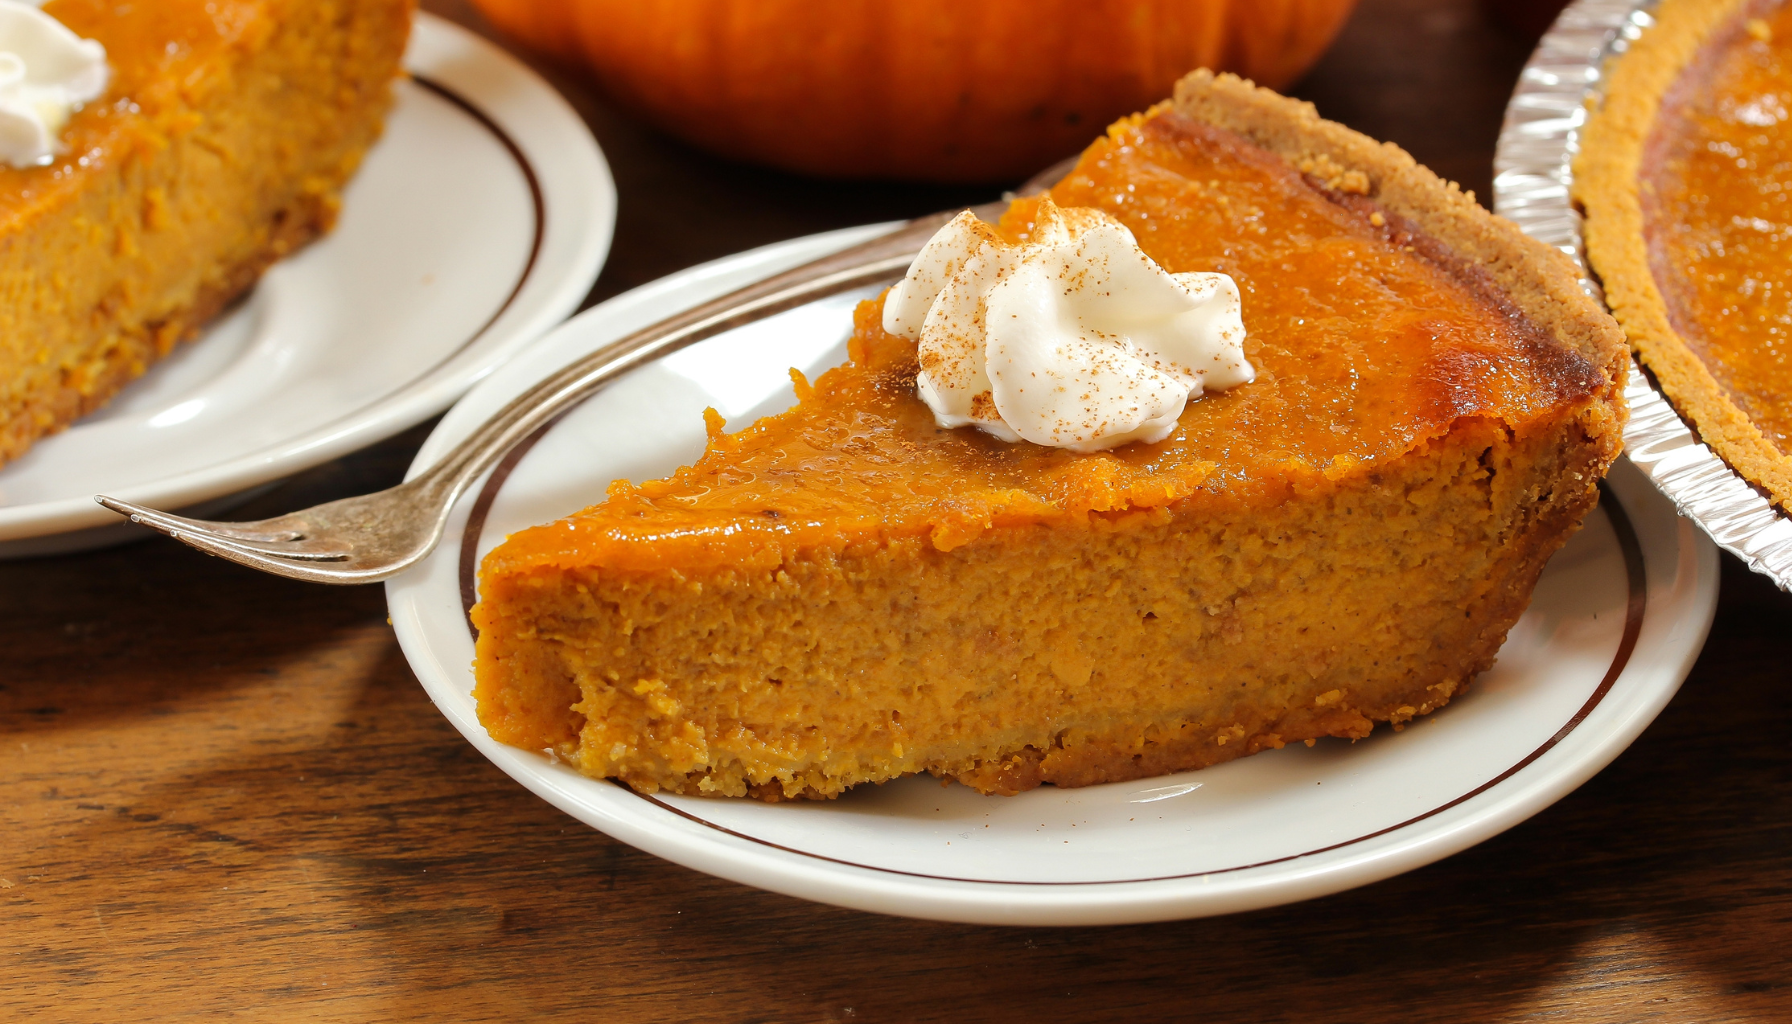
Pumpkin pie is a traditional dessert made from a spiced pumpkin filling baked in a pie crust. The filling is typically made with pureed pumpkin, eggs, sugar, and a blend of warming spices like cinnamon, nutmeg, ginger, and cloves. It’s baked until set and served with a dollop of whipped cream or a scoop of vanilla ice cream. Pumpkin pie has a rich, smooth texture and a comforting, earthy flavor that’s perfect for fall.
Ingredients for Pumpkin Pie
To make the perfect pumpkin pie, you’ll need the following ingredients:
For the Pie Crust:
- 1 1/4 cups (150g) all-purpose flour
- 1/4 tsp salt
- 1/2 cup (115g) unsalted butter, cold and cut into cubes
- 2-4 tbsp ice water
For the Pumpkin Filling:
- 2 cups (480g) pureed pumpkin (or 1 can of pumpkin puree)
- 3/4 cup (150g) granulated sugar
- 1/2 cup (120ml) heavy cream
- 1/2 cup (120ml) milk
- 2 large eggs
- 1 tsp ground cinnamon
- 1/2 tsp ground ginger
- 1/4 tsp ground nutmeg
- 1/4 tsp ground cloves
- 1/4 tsp salt
- 1 tsp vanilla extract
Step-by-Step Instructions for Making Pumpkin Pie
Step 1: Prepare the Pie Crust
- Combine dry ingredients: In a large bowl, whisk together the flour and salt.
- Cut in the butter: Add the cold, cubed butter to the flour mixture. Use a pastry cutter, fork, or your fingers to cut the butter into the flour until the mixture resembles coarse crumbs with pea-sized pieces.
- Add the ice water: Gradually add the ice water, one tablespoon at a time, stirring gently with a fork until the dough begins to come together. Add just enough water for the dough to hold together when pressed.
- Chill the dough: Turn the dough out onto a lightly floured surface and knead it a few times to bring it together. Shape the dough into a disk, wrap in plastic wrap, and refrigerate for at least 30 minutes.
Step 2: Roll Out the Dough
- Roll out the dough: After chilling, remove the dough from the refrigerator. On a floured surface, roll it out into a circle large enough to fit a 9-inch pie pan, about 1/8-inch thick.
- Transfer to the pie pan: Carefully transfer the rolled dough to a 9-inch pie pan. Gently press the dough into the pan and trim any excess dough, leaving about 1 inch around the edge. Crimp the edges of the dough with your fingers or a fork to create a decorative edge.
- Chill the crust: Place the prepared crust in the refrigerator while you prepare the filling. This will help prevent the crust from shrinking during baking.
Step 3: Prepare the Pumpkin Filling
- Mix the filling ingredients: In a large mixing bowl, whisk together the pumpkin puree, sugar, cinnamon, ginger, nutmeg, cloves, and salt.
- Add the eggs, milk, and cream: Beat the eggs in a separate bowl and add them to the pumpkin mixture. Stir in the milk, heavy cream, and vanilla extract until the filling is smooth and well combined.
- Check consistency: The pumpkin filling should be smooth and slightly thick. If it feels too runny, you can add an additional tablespoon of flour to help thicken it.
Step 4: Assemble the Pumpkin Pie
- Fill the crust: Pour the prepared pumpkin filling into the chilled pie crust, smoothing the top with a spatula.
- Bake the pie: Preheat the oven to 425°F (220°C). Place the pie on the center rack of the oven and bake for 15 minutes. Then, reduce the temperature to 350°F (175°C) and continue baking for 40-45 minutes, or until the filling is set but still slightly jiggly in the center. You can test the pie by inserting a knife into the filling—if it comes out clean, the pie is done.
Step 5: Cool the Pie
Once the pie is baked, remove it from the oven and let it cool on a wire rack for at least 2 hours. This allows the filling to set properly. After cooling, refrigerate the pie for at least 4 hours before serving, or overnight for the best results.
Step 6: Serve and Enjoy
Serve the pumpkin pie chilled with a dollop of whipped cream or a scoop of vanilla ice cream. The combination of the spiced pumpkin filling, flaky crust, and creamy topping is absolutely delicious and perfect for the fall season.
Tips for Making the Best Pumpkin Pie
- Use fresh pumpkin or quality puree: While canned pumpkin puree works well, fresh pumpkin can add a richer, more complex flavor. Be sure to cook and puree your pumpkin thoroughly if using fresh.
- Don’t overbake: Overbaking can cause the filling to crack. Check the pie towards the end of the baking time to ensure it’s just set in the center.
- Chill the crust: Chilling the pie crust before filling helps prevent shrinkage during baking and ensures it stays crisp.
- Customize the spices: Feel free to adjust the spices to your taste. Some people like to add a pinch of allspice or cardamom for extra warmth.
- Serve with a topping: Pumpkin pie is often served with a dollop of whipped cream or vanilla ice cream. For a fun twist, top with caramel sauce or a sprinkle of cinnamon sugar.
Troubleshooting Common Pumpkin Pie Problems
- Runny filling: If your filling is too runny, it could be due to overmixing or underbaking. Make sure to bake the pie until the filling is set and slightly jiggly. If the filling doesn’t set, it may need to bake a little longer.
- Soggy crust: If the crust becomes soggy, make sure to blind-bake the crust before filling it. This helps to create a barrier between the filling and the crust.
- Cracked filling: Cracks in the filling can occur if the pie is overbaked or if the filling was too stirred. To prevent cracking, bake at a lower temperature and avoid overmixing the filling.